ASUS Z97-Pro WiFi AC Review
by Ian Cutress on July 16, 2014 10:00 AM EST- Posted in
- Motherboards
- Asus
- Haswell
- 802.11ac
- Z97
ASUS Z97-Pro WiFi AC BIOS
We analyzed the BIOS in our review of the Z97-Deluxe, and not much has changed between this and the Z97-Pro.
Due to the brushed metal accents on the motherboard, the BIOS is similarly styled to give consistency, and rather than using the standard BIOS font, a more readable (and adjustable) font is used instead. The first screen encountered is the EZ mode, showing the motherboard name, the CPU installed, the CPU frequency, CPU temperature, fan speeds, DRAM installed, DRAM speeds and also options to enable XMP from this screen.
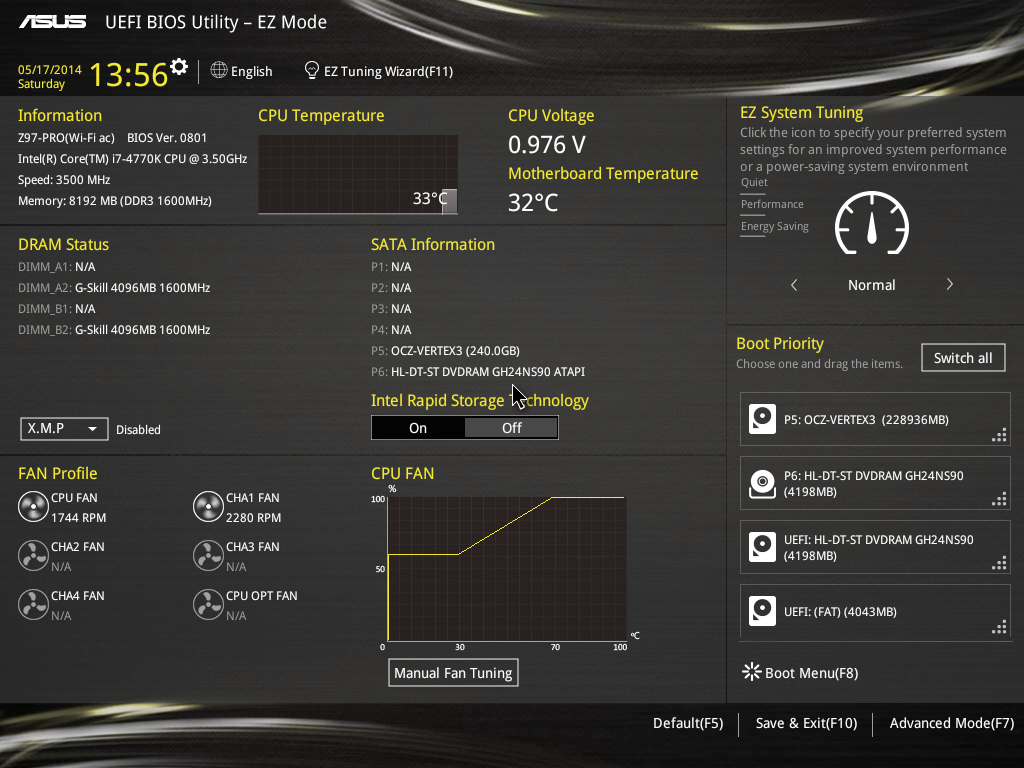
Users can enable XMP from this menu, as well as select the boot priority and quick tuning profiles for the system. A cool new addition is the fan profiling, direct from the easy mode. The fan speeds on the left show a fan spinning, and the faster a fan spins, the faster the animation. But click on the button marked ‘Manual Fan Tuning’ and after a quick test of the system fans, the following menu appears:
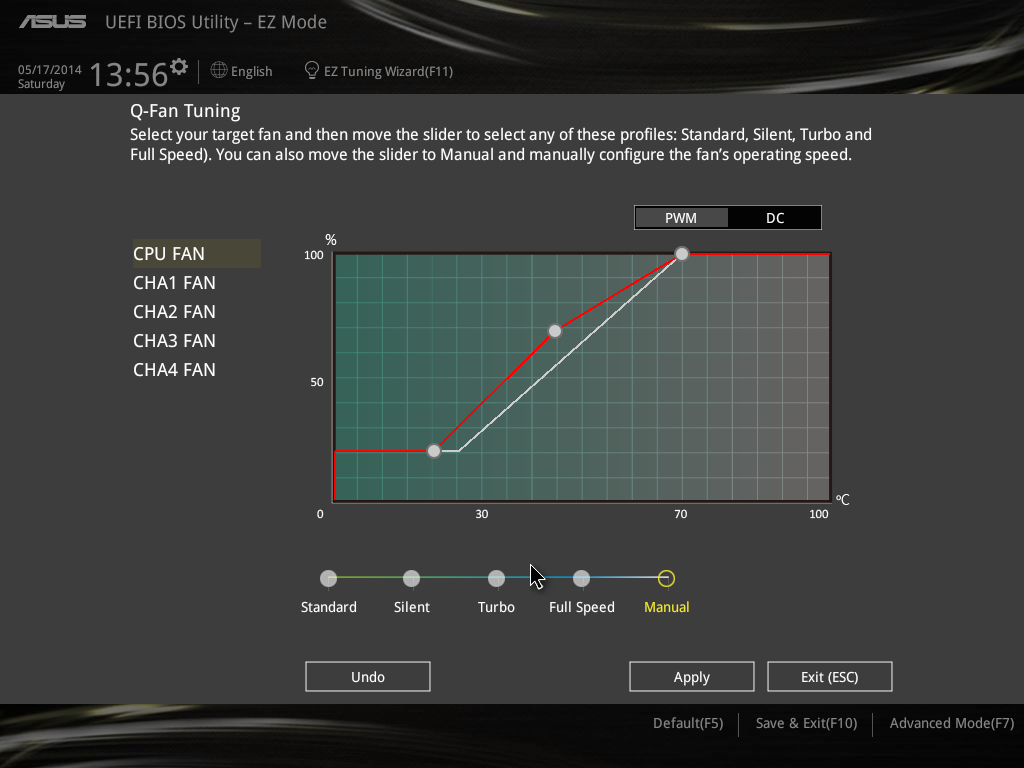
Users can select each of the five controllable fan headers (the sixth header onboard is for liquid coolers that want 100% pump operation) in either PWM or DC mode. Each fan can be referenced to one of the five preset options (standard, silent, turbo, full speed) or users can go manually and adjust a three point gradient. Ideally I would prefer more points in the gradient and a hysteresis option here in the BIOS as well, but we will look forward to any future adjustments.
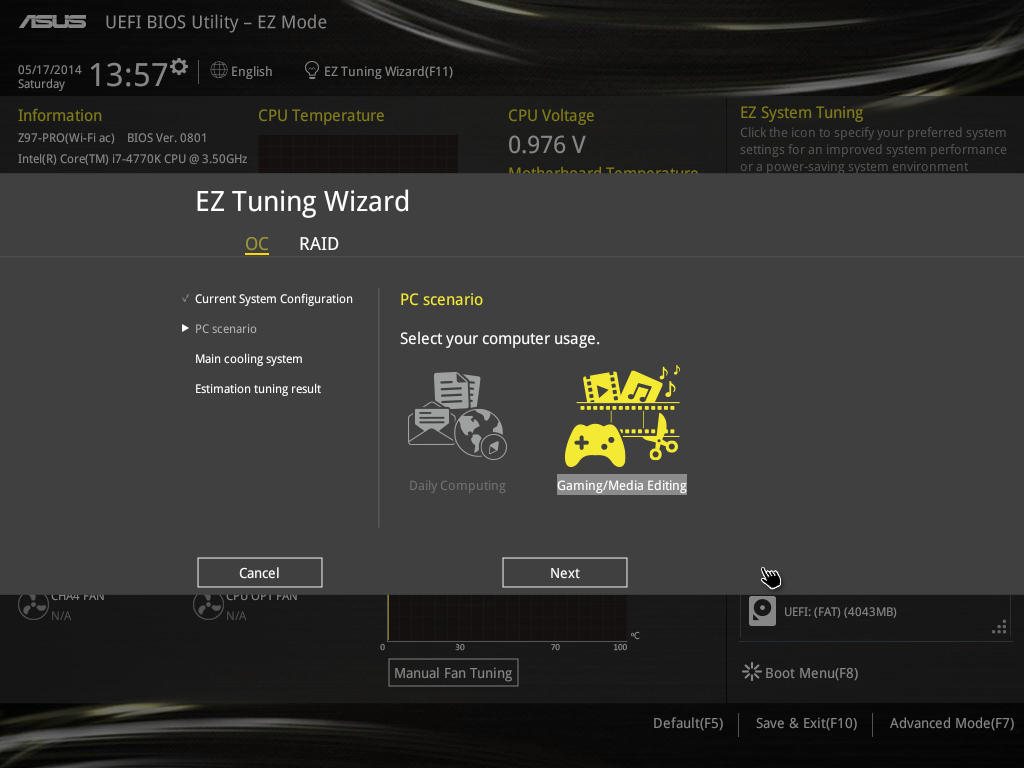
Also part of the Easy Mode is the Tuning Wizard. This is a button up the top, above the CPU Temperature. Selecting it gives the following screen:

On previous ASUS motherboards I had lamented the lack of variable overclock options. It was often just ‘Tuner’, or a choice between ‘Fast’ and ‘Extreme’. ASUS took this onboard from several sources and developed this interface, allowing users to select what they do with their PC:
What sort of cooling is being used:

And then the BIOS gives an estimate of possible overclocks when the Tuning Wizard is implemented:
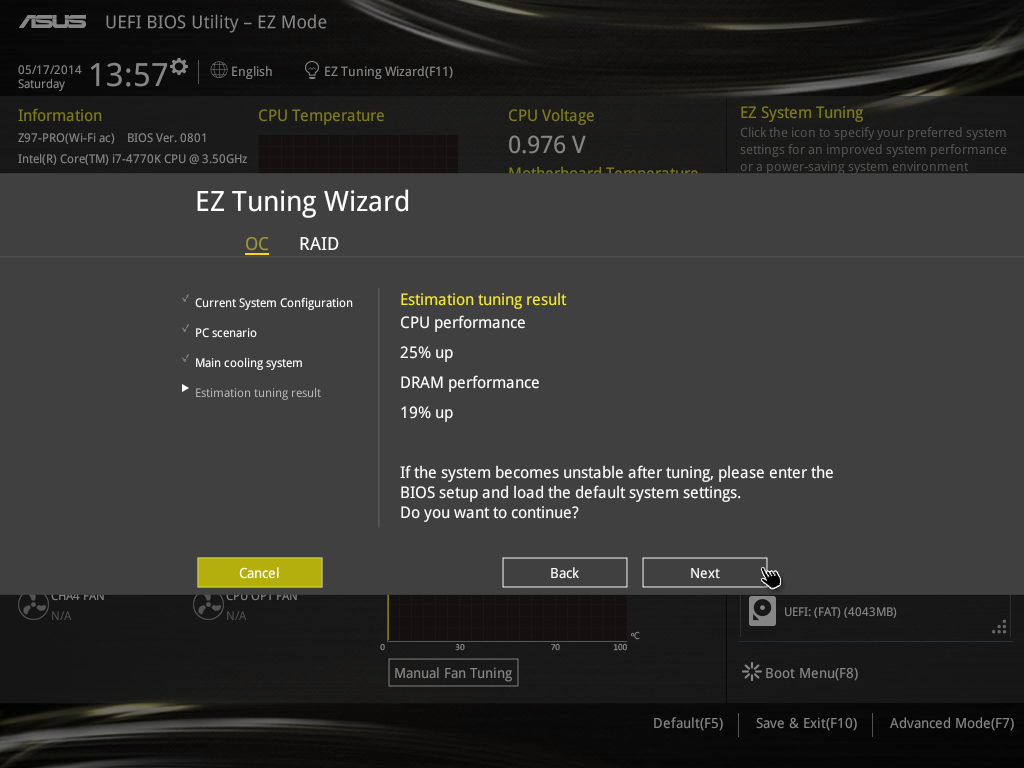
So in this case, the BIOS is predicting (based on internal testing and a lookup table) a 25% increase in CPU speed (3.5 GHz to 4.4 GHz) and a 19% boost in DRAM speed (1600 MHz to 1866 MHz) when we had an i7-4770K equipped with 8GB of G.Skill DDR3-1866 C9. At present the BIOS is not that smart, so if the overclock fails the user will have to get into BIOS and set defaults if their CPU cannot take the speed and voltage. Because Haswell is so varied in its performance (e.g. I have had a CPU that fails 4.3 GHz at 1.35 volts), ASUS and other motherboard manufacturers have to draw the line between aggressiveness on auto overclocking against the likelihood that some CPUs are bad overclockers. If an overclock fails, try retaking the tuning and selecting the lower cooling option; this will cause the temperature limits in the OC to adjust to hopefully accept an overclock on a poor processor.
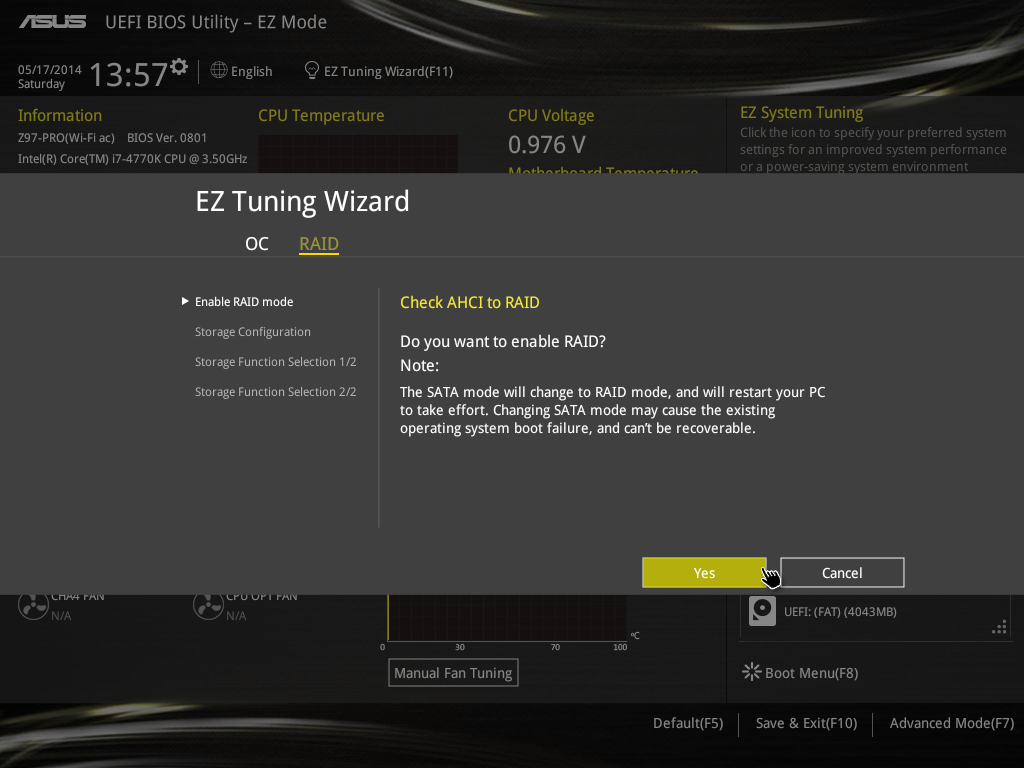
Astute readers will notice that Easy Tuning also has a RAID function. Part of the feedback ASUS has received from the 8-series is the ability to build RAID drives using hardware drivers. This tool is designed to take control of the Intel RAID interface, and users can build arrays through the BIOS instead.
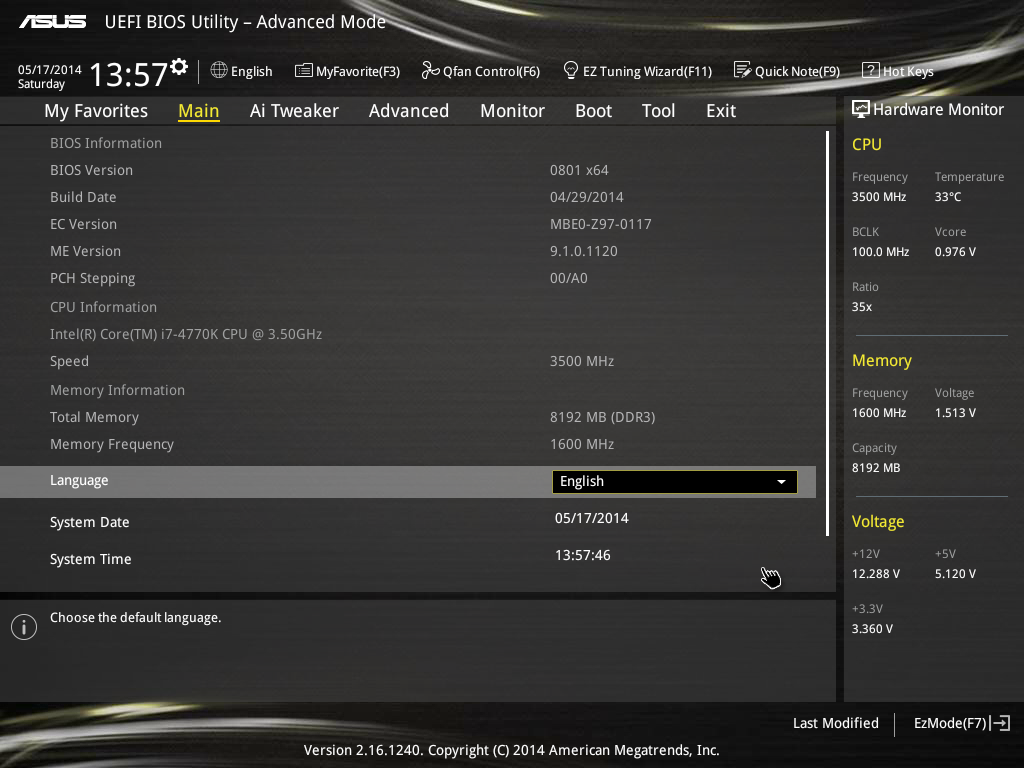
Moving into Advanced mode also affords an adjustment from Z87. ASUS is being more economical with the space, and the use of a different font makes it more readable with no need to put significant gaps between each row of text. As a result, we get a Hardware Monitor on the right hand side with all the poignant information about the CPU, DRAM and Voltage. I would have liked the motherboard name and BIOS version in there as well, just to complete the set. At the bottom is the help menu. Moving it to a longer horizontal side allows more text on the same line and less strain on users who read about controls to keep adjusting their eye line.
There are some new and updated features in the BIOS that work well. The My Favorites menu has adjusted so users access a setup map (like a sitemap) in order to select the options for My Favorites:
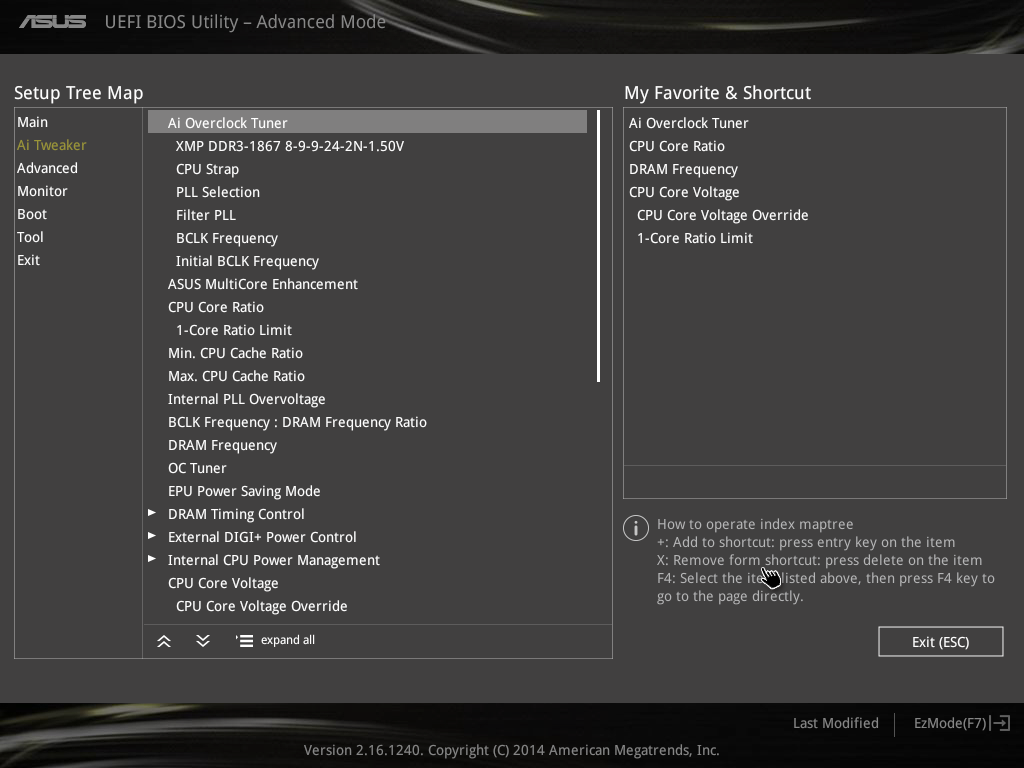
With the color scheme and font, this is actually really easy to use. Previously users had to navigate to each option and press F4/right click to add to my Favorites, but this condenses that selection into a single menu speeding up the process. The options that I usually use for overclocking my home systems are selected in the screenshot above, which when we navigate to My Favorites gives:
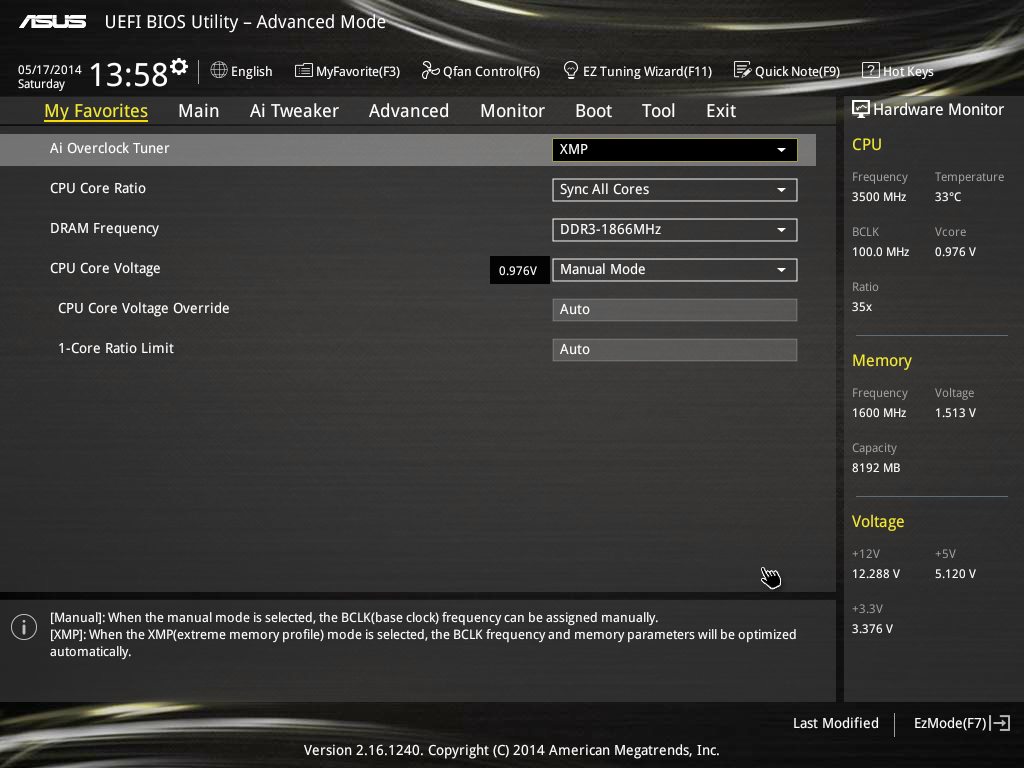
For the settings that involve voltages or specific values (such as CAS Latency), the BIOS gives in indication of the current value, whereas the help section at the bottom will display the range and granularity of the setting.
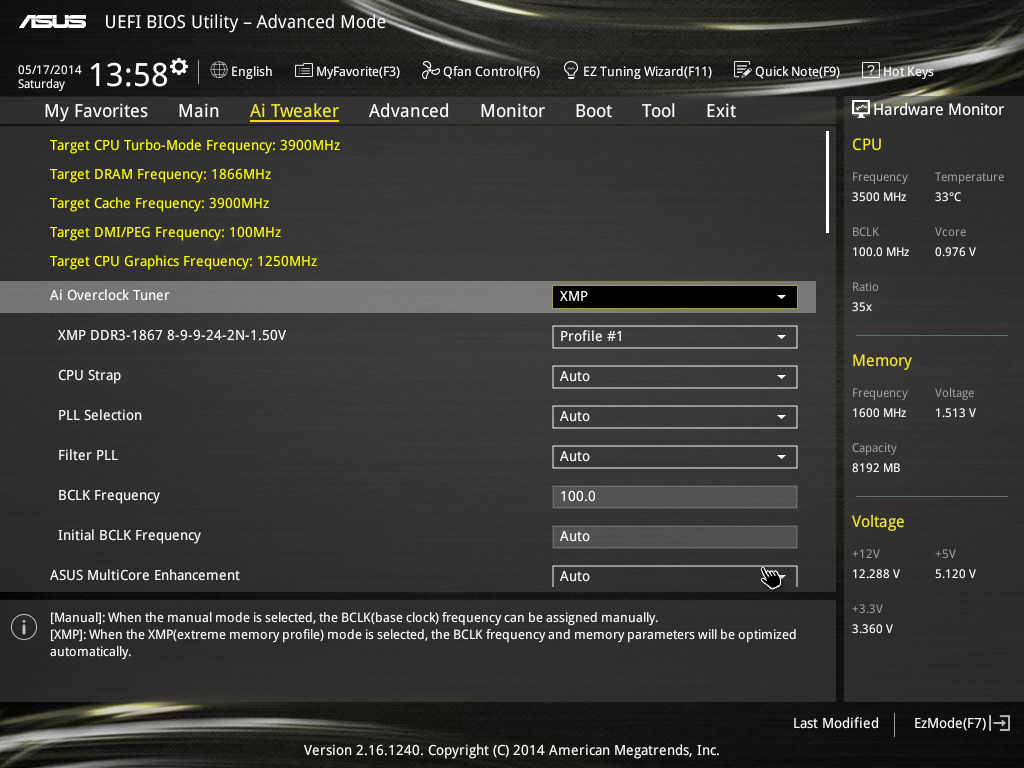
The full overclocking options are in AI Tweaker, and these follow the previous BIOS iteration starting with frequency settings, with sub-menus for DRAM timing and DIGI Power, and then voltage settings. For extreme users wanting to use sub-zero cooling, the OV_CPU jumper on the motherboard has to be enabled to allow extreme voltages:
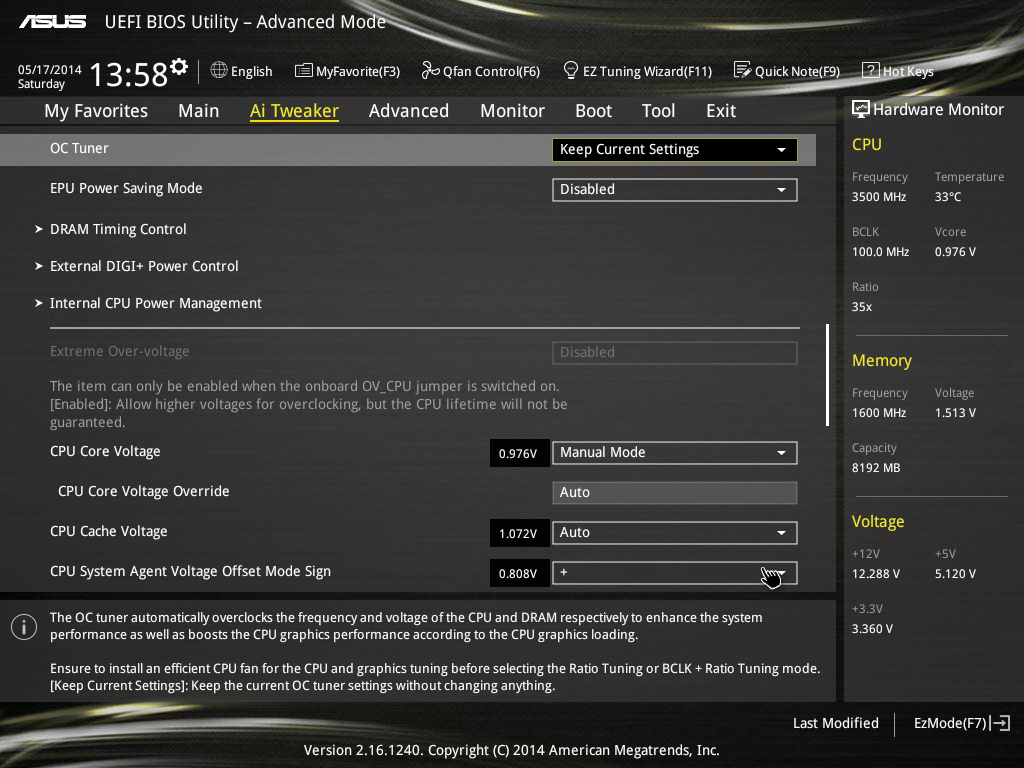
Load line calibration and switching frequency options are in the DIGI+ Power Control sub-menu, whereas power limits are in CPU Power Management.
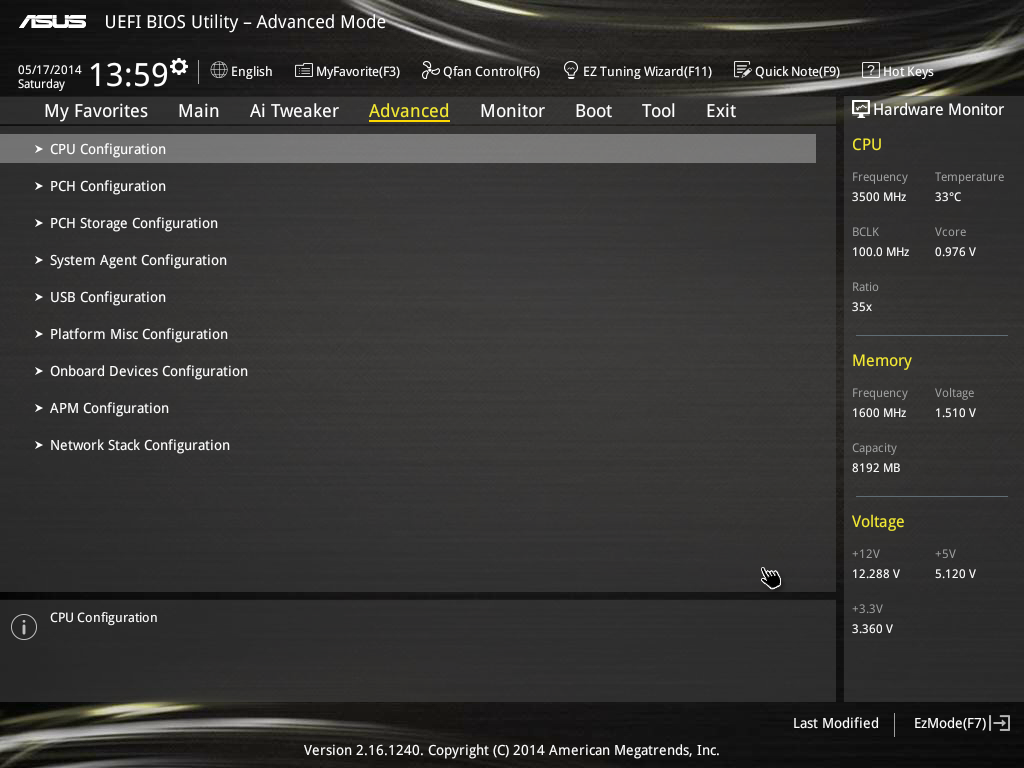
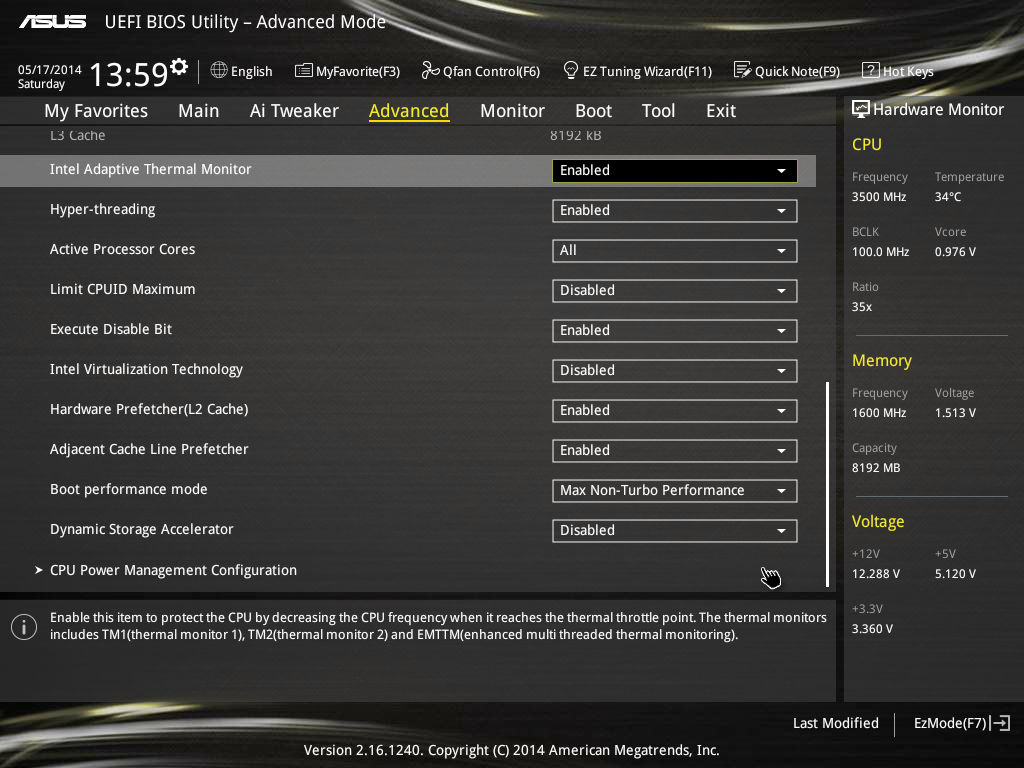
Because of the use of switches to enable/disable certain features when others are in use, it pays to understand certain options in the Advanced tab. The usual options are all here, such as HyperThreading in the CPU Configuration menu:
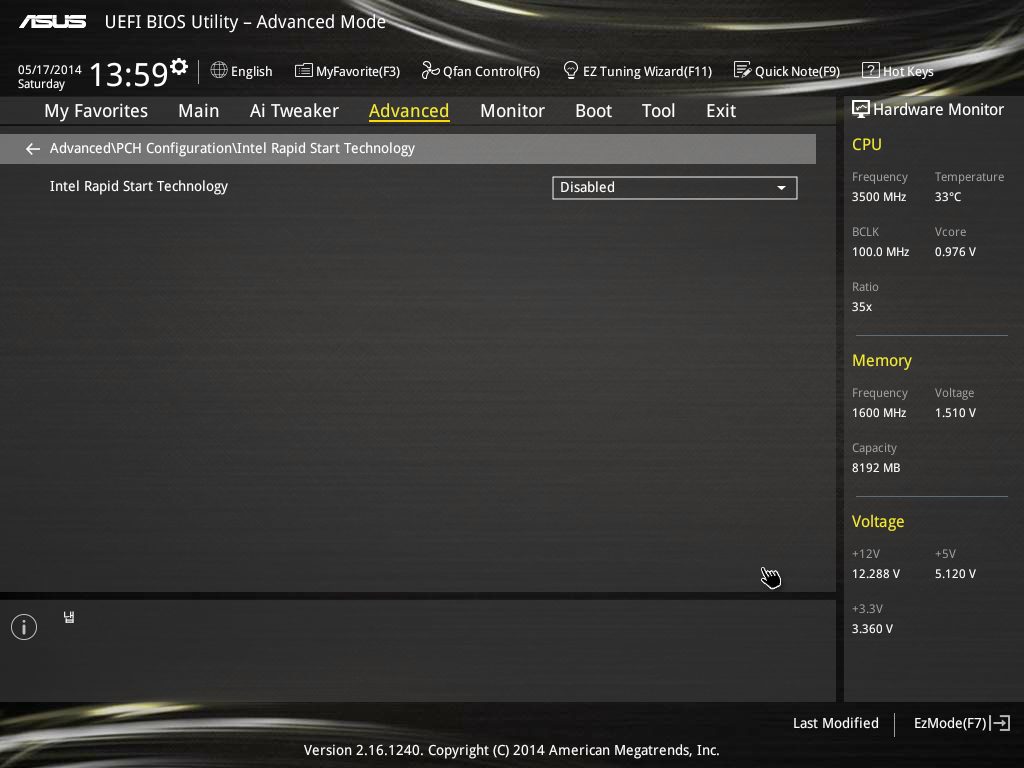
RST/SRT in the PCH Configuration menus:
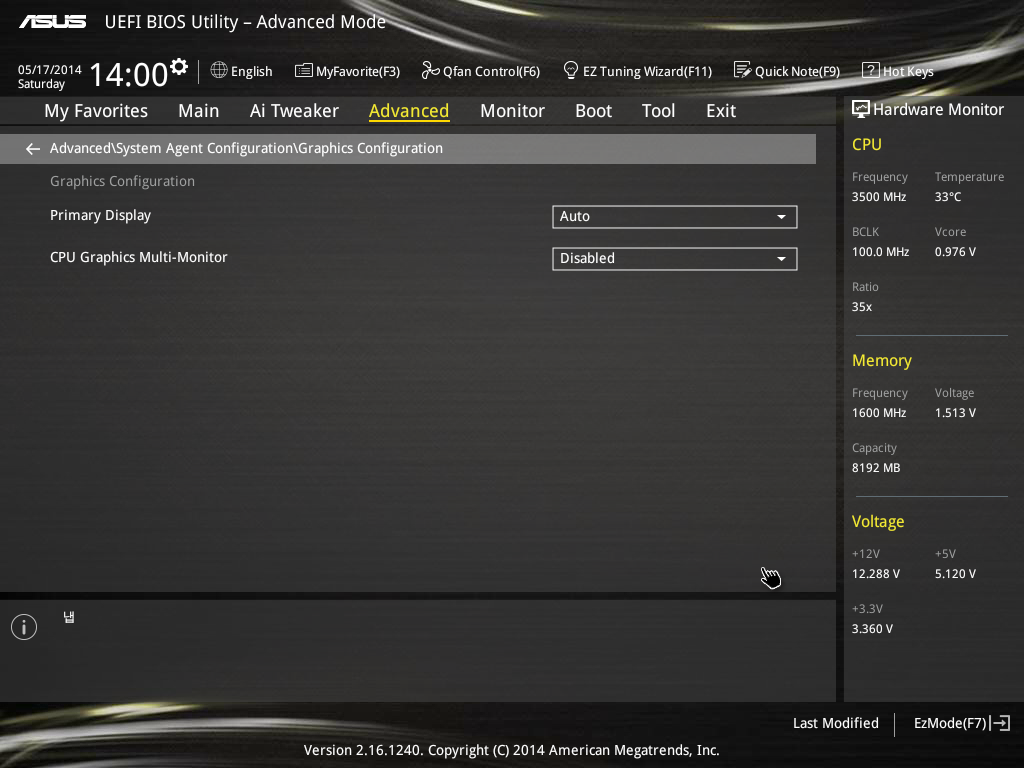
Display choices in the System Agent Configuration menu:
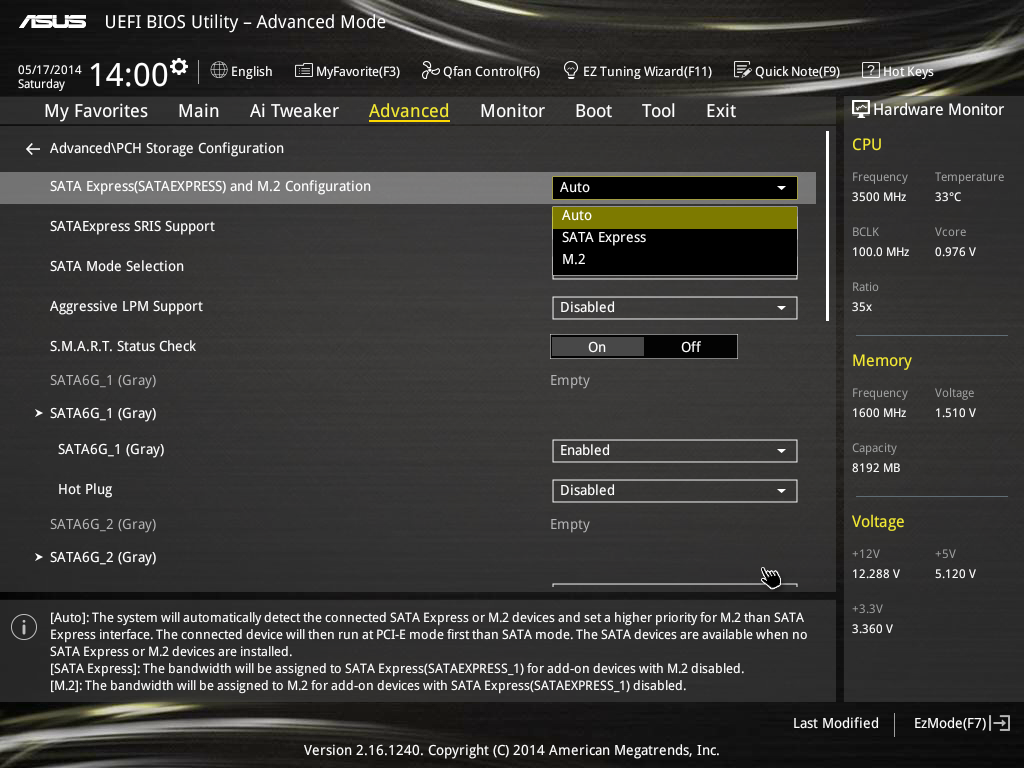
Out of the two most important menus in Advanced, the PCH Storage allows users to force select between the chipset SATA Express port and the M.2 slot:
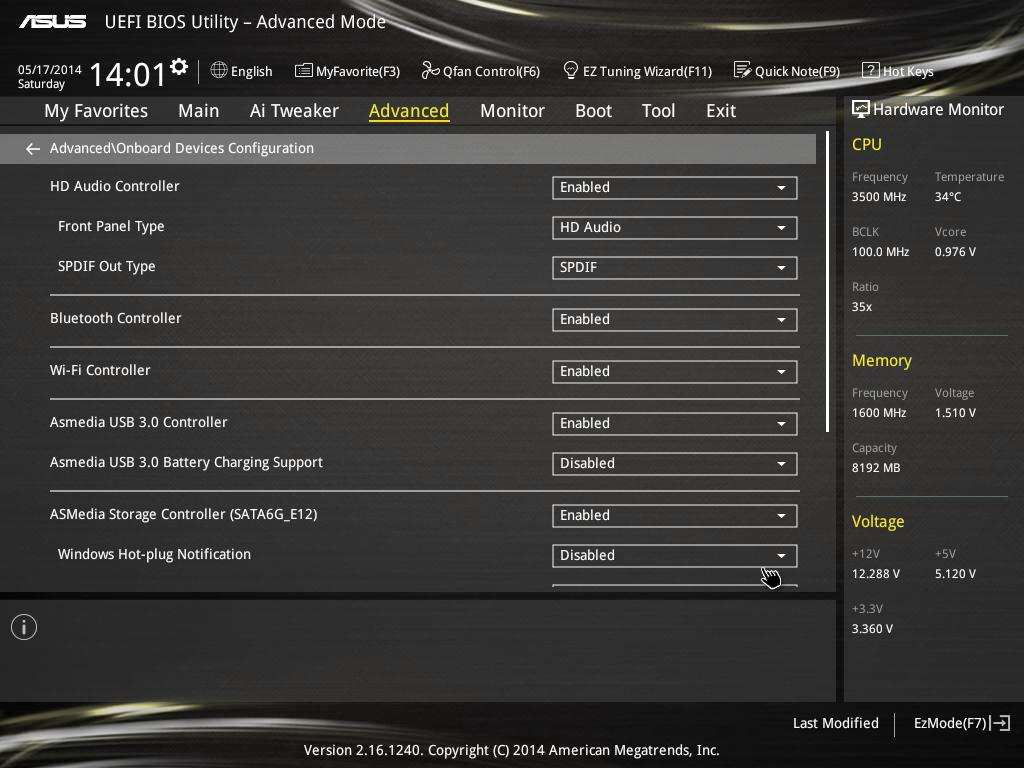
Whereas the Onboard Devices menu will allow users to enable and disable the WiFi, USB 3.0 and extra SATA ports. For example, the hot-plug functionality of the ASMedia SATA controller is actually disabled by default in our BIOS version:
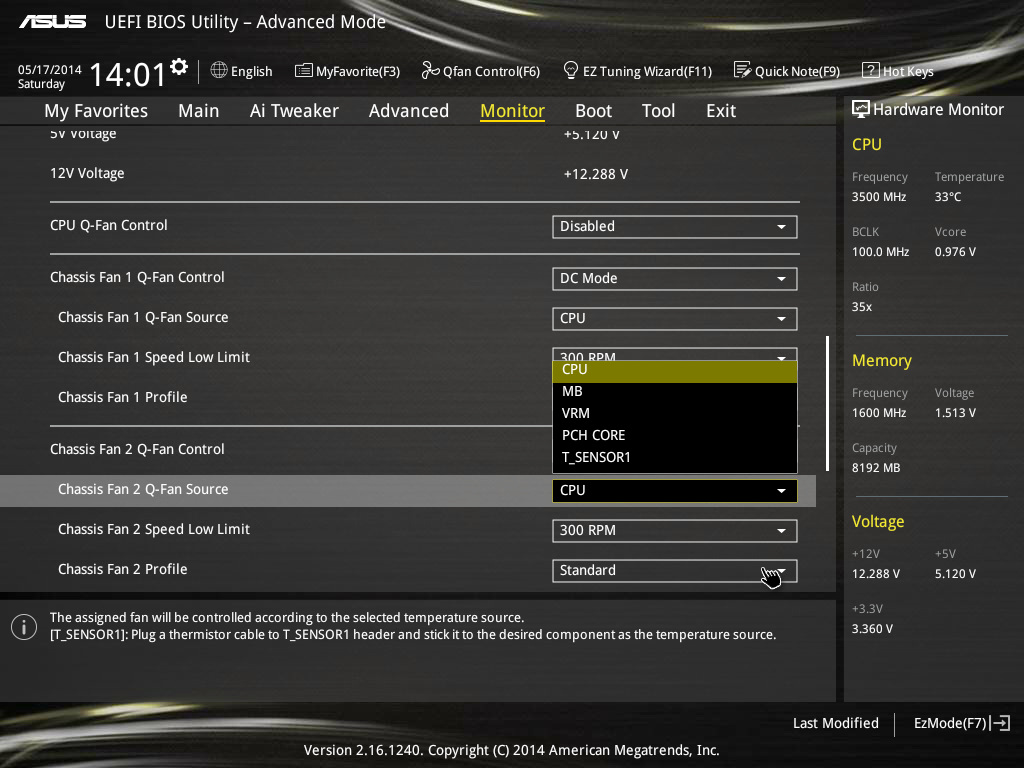
The Monitor tab contains the onboard sensors, as well as the option for Q-Fan Tuning. This tuning needs to take place before using the custom graph adjustments in the Easy Menu, but the easy menu will direct users here automatically. In this menu however users can tie each of the fan headers to a specific sensor on the motherboard, including the T_SENSOR if a user wants to use their own thermocouple.
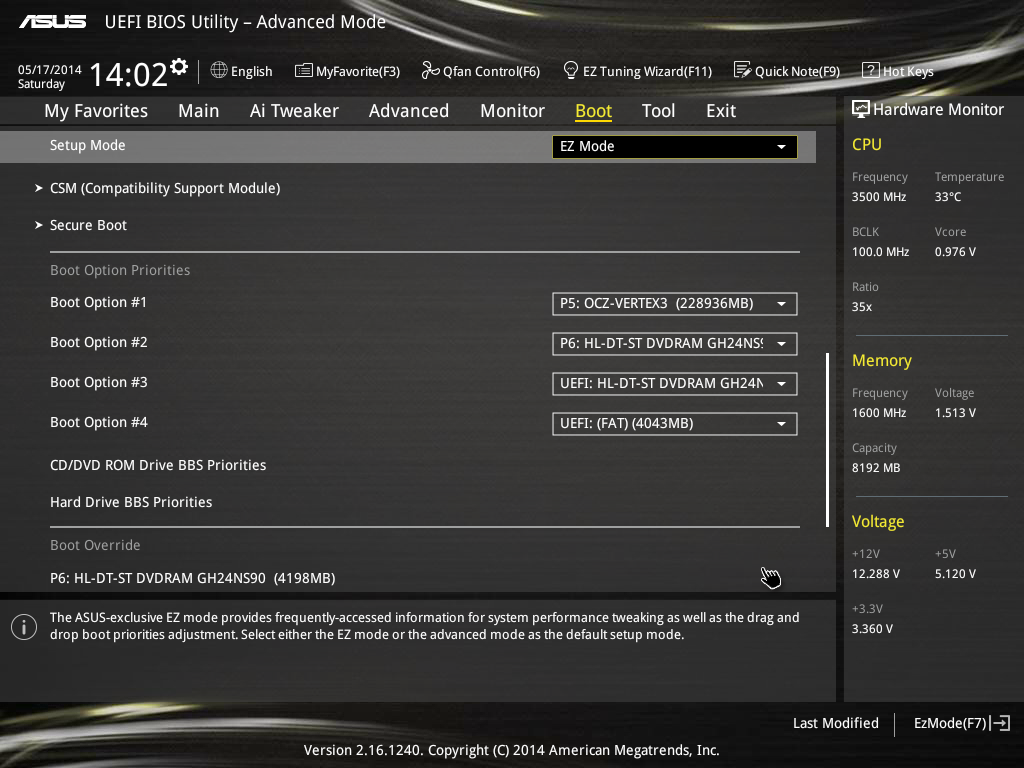
The Boot tab contains the fast boot options, the boot order and also the boot override features:
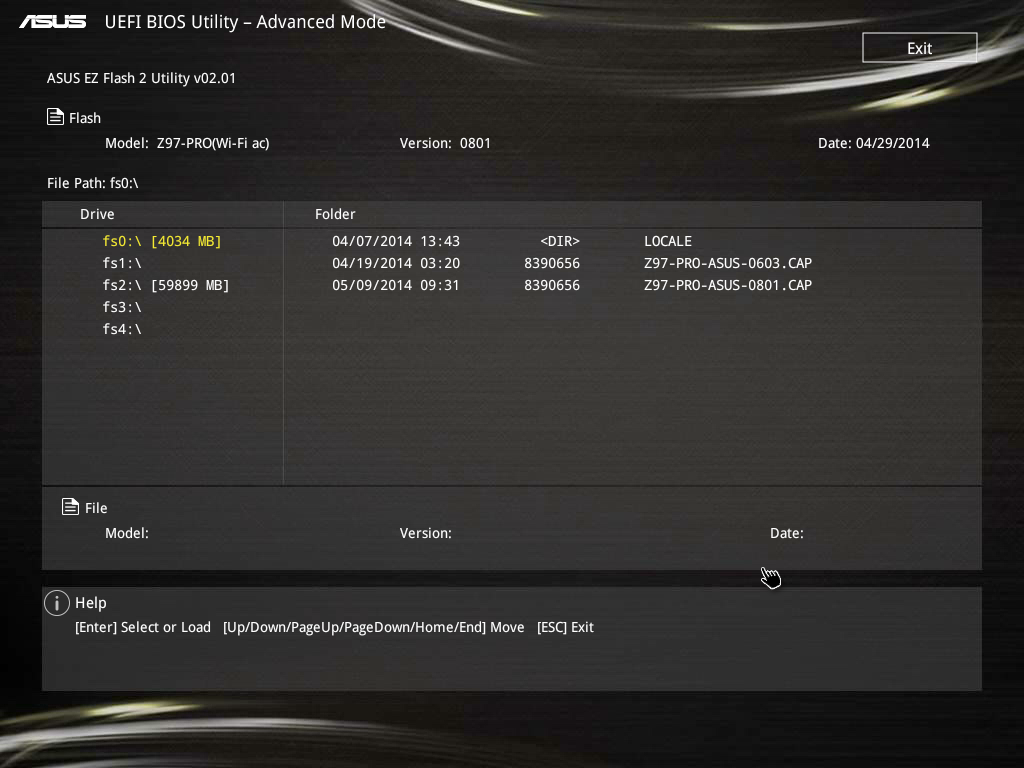
To update the BIOS, ASUS still has the EZ Flash 2 tool in the Tools tab:
The Tools tab also contains options for saving overclocking profiles and viewing DRAM SPD information. Because of the ability for ASUS to adjust font sizes in this new BIOS revision, even though the SPD info page has to use the Courier font due to the amount of information, we can get it all on one screen:

Carrying over from the last generation of BIOSes is also Quick Note and Last Modified. Quick Note is essentially a small note pad to write notes about the BIOS, and Last Modified indicates which settings in the BIOS have changed since the system booted.


ASUS Z97-Pro WiFi AC Software
The AI Suite package is the main interface for all of the software features on ASUS motherboards. The interface for the Z97 version is mostly similar to the Z87 package, however the move from Dual Intelligent Processors v4 to v5 adds another element into the equation. One of the big updates to the package is the Turbo App feature that allows users to define specific overclock settings on a program-by-program basis. This means that if a user is playing a game, the overclock can be boosted from normal OS usage, or if in the case of some single-threaded picture editing work, the speed of single core processing can be boosted while the system is in action.

The front screen for the software features each of the main system options, including the overclock settings (TPU), the fan settings (Fan Xpert 3), VRM control (DIGI+ Power), Energy Saving (EPU) and the new Turbo App. The automatic overclocking is here, and we have moved from 4-Way Optimization in Z87 to 5-Way Optimization (5WO). The big update to 5WO is the ability to adjust how the system performs the auto overclocking:

A user can now select the ratio that the tool starts from, set the peak temperature to hit during testing, peak power consumption of the CPU and how long the stress test at each point is. This is a big step forward in automatic overclock controls, and allows users to implement, for example, an overclock that reaches a peak temperature of 85ºC and is stress tested for an hour at each point of the scaling. The stress test comprises of a few internal tests from ASUS, including a Prime95 derivative.

The final report gives the overclocking results, and in the screenshot above we see a rise to 4.5 GHz with 1.247 volts with a maximum power draw of 133 W.
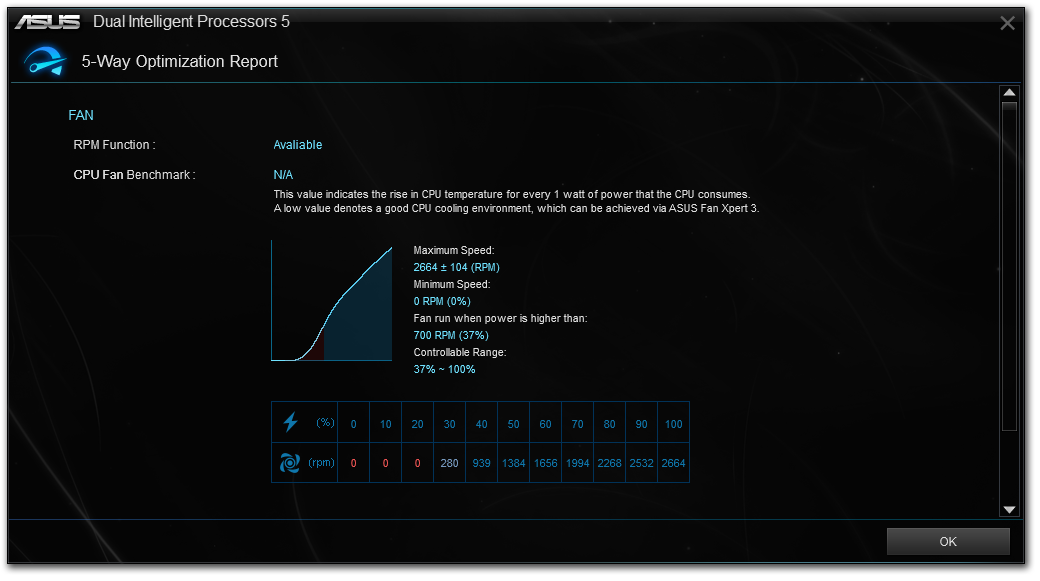
As part of the automatic overclock it also tests the fans to find their controllable range and adjusts the fan profiles accordingly.
When changing the manual settings, each of the five ways in 5WO can be adjusted. TPU has the CPU options:

The good thing about overclocking in the OS like this is the CPU voltage graphs showing the correlation between the CPU ratio and the voltage applied. As a user adjusts the voltage scales, the graph changes accordingly to give direct feedback.
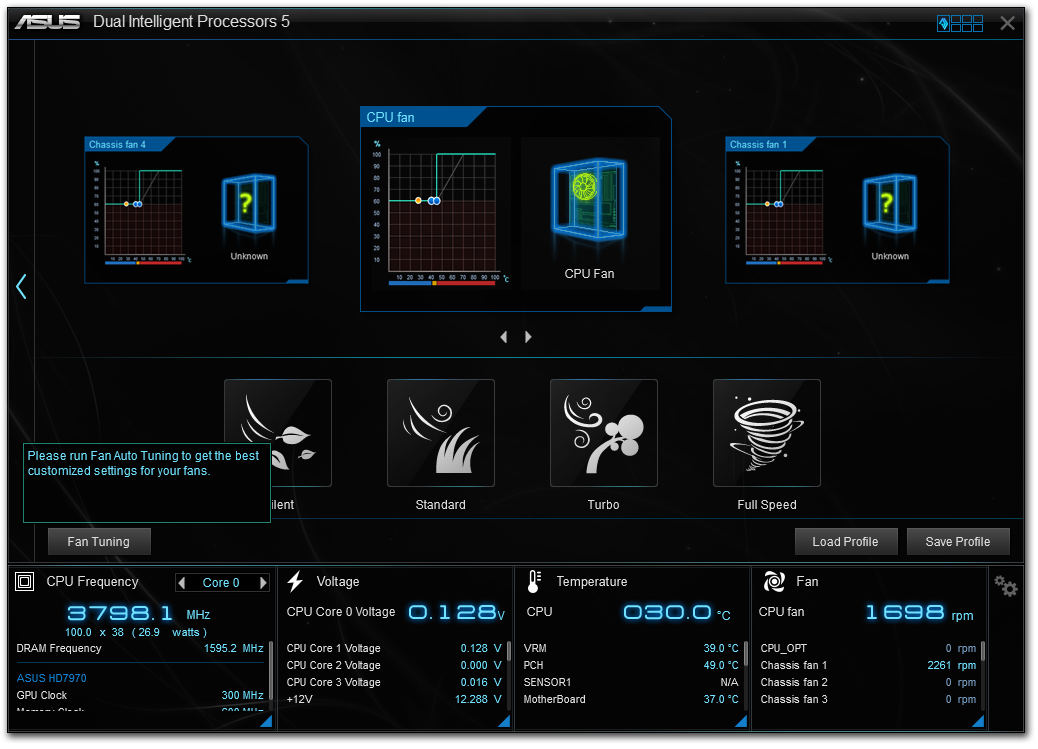
The fan options also show their respective graphs, with users being able to choose from presets or initiate the Fan Tuning option so that the software can report any power dead-zones or the quiet zones:
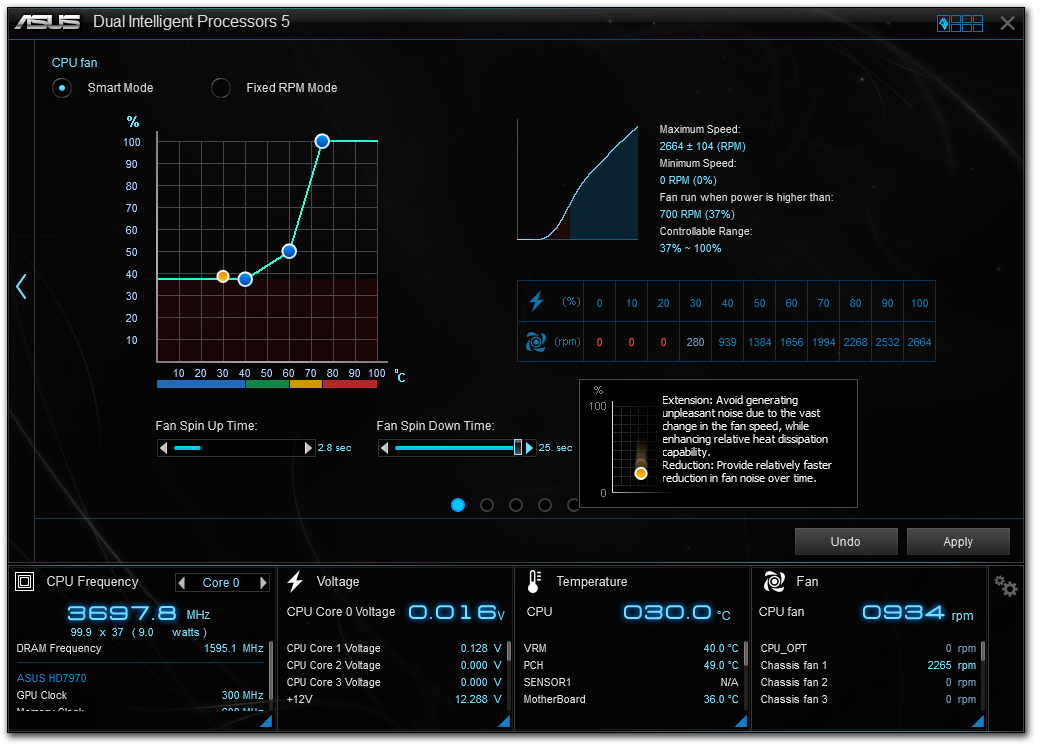
ASUS also offers fan spin up and spin down time, which tries to slowly ramp up or down the fan speed when the temperature changes suddenly. In the form of spin-down time, this can be considered a form of hysteresis so naturally I would push it to the maximum possible such that when I stop playing a game, my fans would cool the case quicker than immediately reducing the fan speed when I exit.
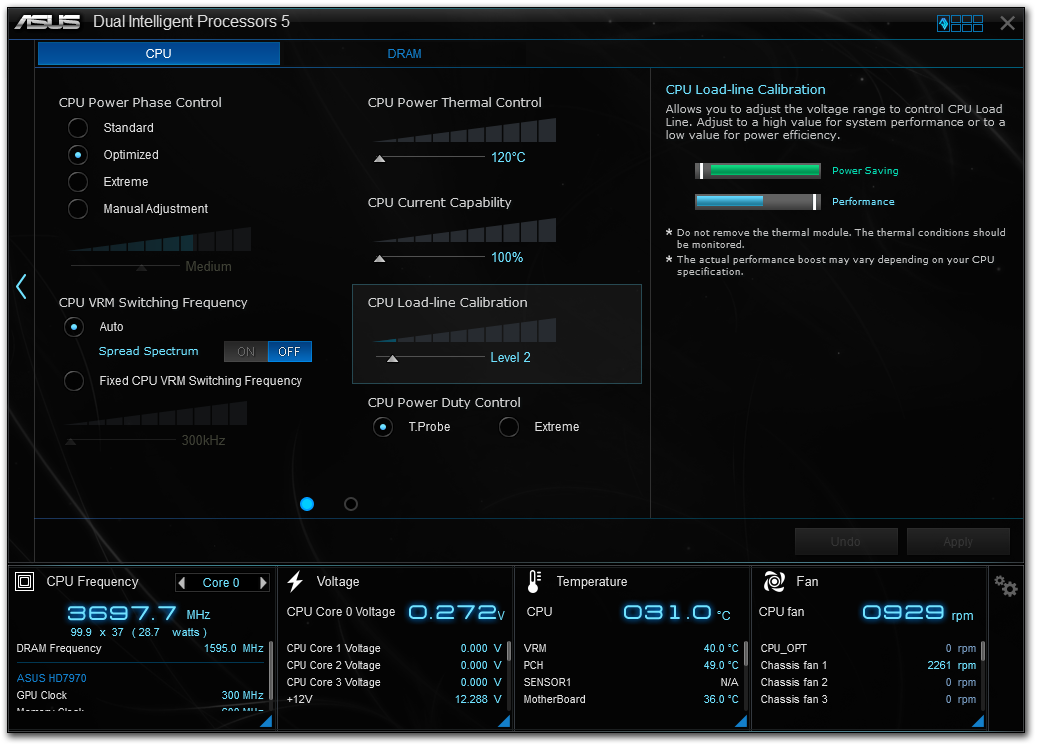
For manual overclocking we typically adjust the maximum limit of the phases as well, giving them more headroom. These options are in the DIGI+ Power Menu, as well as Load Line Calibration which helps keep a constant voltage across the processor while under load.
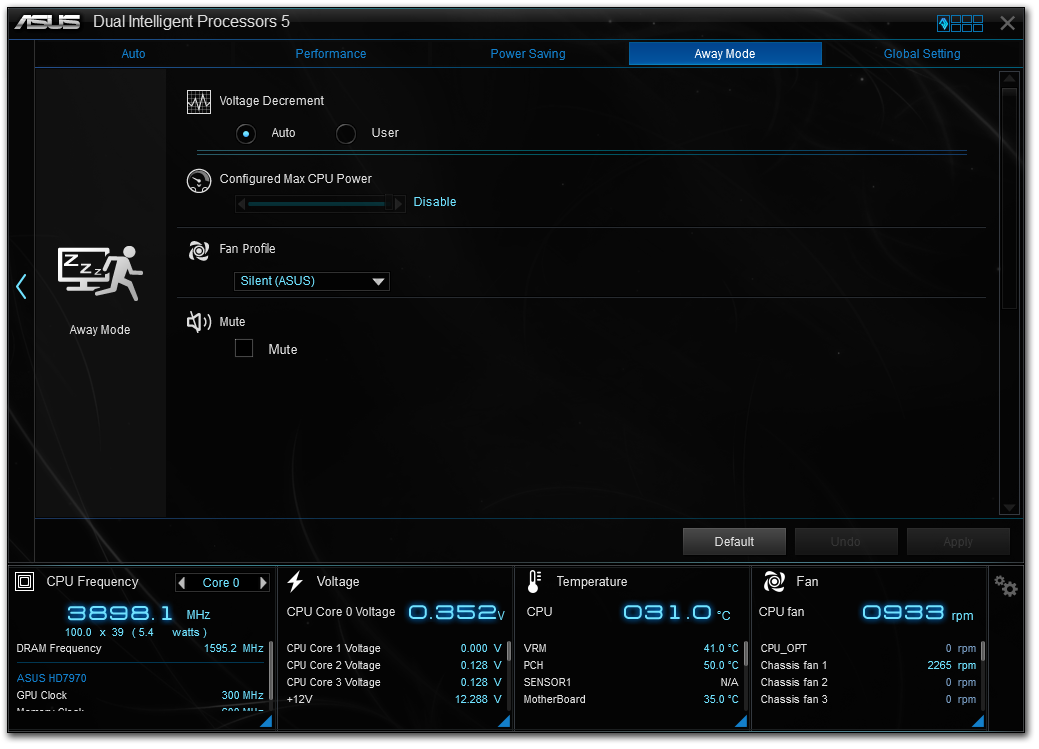
The EPU menus allow for customization of power profiles. One of the features ASUS likes to point out is their Away mode which will help power conscious users reduce their power consumption by configuring the maximum CPU power and adjusting the fans.
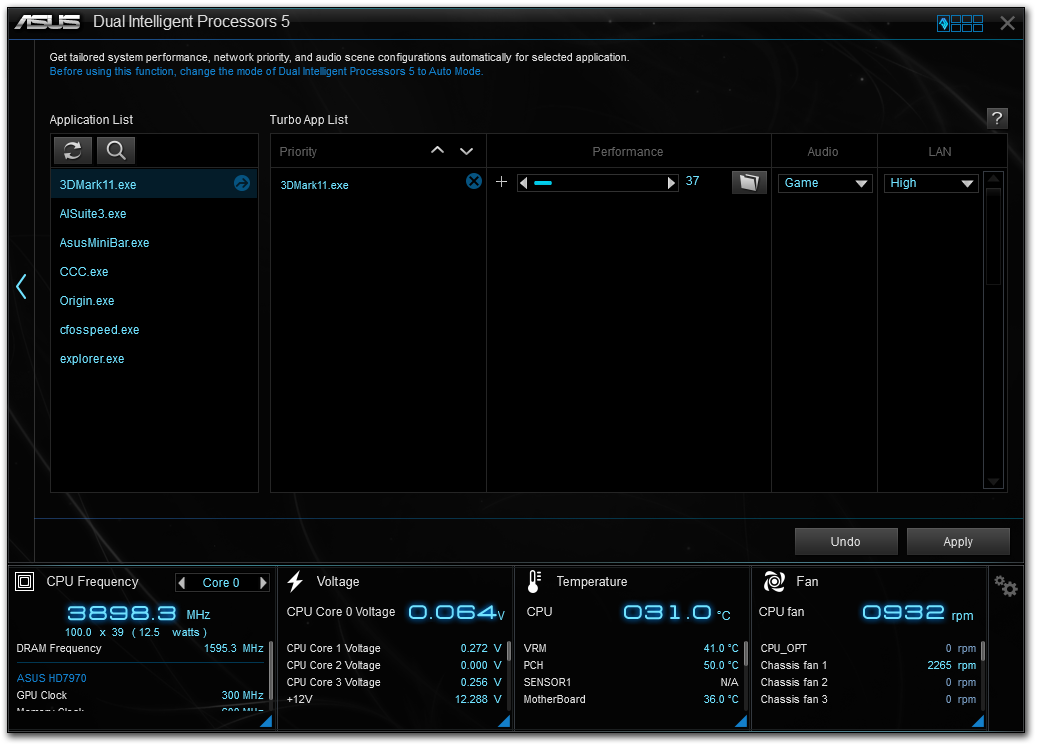
The Turbo App feature, as shown above, gives the configuration of an overclock for a per-application basis. As an example, I can have set two of the games installed on the system for high overclocks and high network usage, but for the ASUS software the multi-threaded overclock is reduced back down to stock performance.
The rest of AI Suite deals with the non-overclocking oriented features of the motherboard. We have covered some of them before:
USB Charger+: Quick charging of a single device via USB 3.0 by disabling data transfer and increasing power delivery.
USB 3.0 Boost: Offers an additional speed for Windows 7 USB 3.0 devices by implementing an updated driver on-the-fly.
USB BIOS Flashback: A quick setup tool to prepare a USB stick for flashing the BIOS without a CPU, DRAM or GPU connected.
EZ Update: Software to allow updates to the system, primarily drivers, software and BIOS.
Wi-Fi Engine: Set up the system as an access point for a home network.
Wi-Fi Go!: Use the Wi-Fi on the system with the Android/iOS app to give remote desktop access via a smartphone or tablet, along with file transfer, cloud storage and remote keyboard/mouse control.
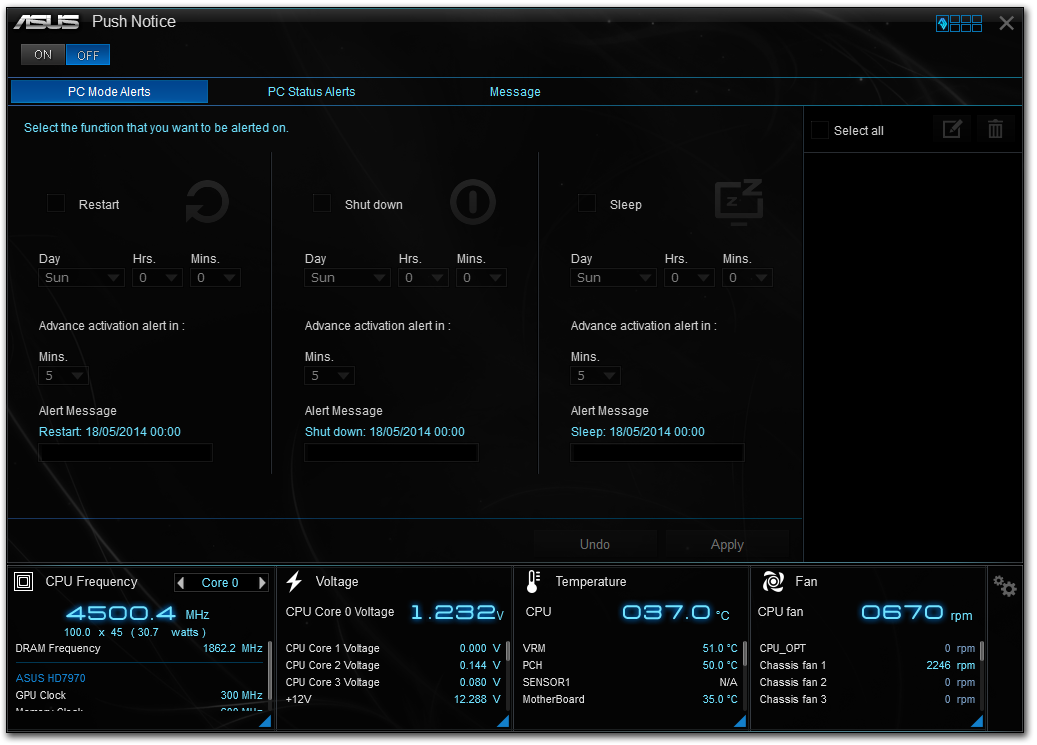
One of the newer features in the software is Push Notice. This allows a user to configure an alert that will be sent to a paired device if the system meets an alert criterion, such as an abnormal temperature/fan RPM/voltage reading or an unexpected system restart.


38 Comments
View All Comments
DanNeely - Wednesday, July 16, 2014 - link
Is the ASMedia USB3 controller a PCIe based controller or just a USB3 hub?Ian Cutress - Wednesday, July 16, 2014 - link
Controller, ASM1042AEhttp://www.asmedia.com.tw/eng/e_show_products.php?...
DanNeely - Wednesday, July 16, 2014 - link
Excellent. This board looks closer to my perfect spec than anything else I've seen reviewed so far. Add a PLX instead of toggling stuff off to run the 4x slot above 1x electrical, and 2 more USB ports in the empty space on the back and I'd call it perfect.Cellar Door - Wednesday, July 16, 2014 - link
Really??? No m2.sata - ASUS are not very forward thinking at the moment, sure they are pushing sataexpress but this is A DEAL BREAKER for me.Cellar Door - Wednesday, July 16, 2014 - link
My bad, I have no idea how I missed it...DanNeely - Wednesday, July 16, 2014 - link
1042 or 1142? The manual has no mention of a 1042 controller but does mention an ASMedia 1142 in the IRQ table. Google turns up ASmedia USB3 drivers for the 1142 but the chip itself appears to be missing from ASmedia's site so I can't confirm it's still a PCIe-USB3 chip and not a hub. I took a look at the full resolution top down image of the board to see if I could find it; but it fell just short of being high enough resolution to read the marking on the chips.DanNeely - Friday, July 18, 2014 - link
Found an article elsewhere claiming the 1142 controller does USB3.1. With Asus not advertising that feature I'm leaning toward the manual being in error...http://www.techpowerup.com/201559/msi-also-shows-o...
mapesdhs - Wednesday, July 16, 2014 - link
I helped a friend build a system using this mbd model last week, with a 4790K,
16GB/2400 TridentX, two GTX 580s, EVO 120GB, etc. He was thoroughly delighted,
said he'd never seen Windows fly so fast, from the initial install to the pace of updates.
By all accounts, a good board.
Ian.
willis936 - Wednesday, July 16, 2014 - link
Interesting choices. Did you get a good deal on the 580s?mapesdhs - Wednesday, July 16, 2014 - link
Sure, because my friend bought them from me. :D I have lots of them,
bought about 20 in the last year or so.
He uses them for accelerated rendering in Blender, for which two 580s
is quicker than a Titan but a lot cheaper (VRAM limits not withstanding).
My own system has four, faster than two Titan Blacks (AE/CUDA, Arion, Cycles).
I want to build a newer system for driving a 4K display in a few months' time,
but I'll probably get the Maximus VII Ranger instead. I also want to build an HTPC
for the same display, more for video and light-3D like Google Earth, will probably
get an ASUS Z97I-Plus for that as the price looks good for the features provided.
Might wait for Maxwells in both cases though.
Ian.